What is a Teeth Whitening Photoshop Action
In the realm of digital image editing, achieving a perfect smile often involves teeth whitening. While manual techniques exist in Photoshop, they can be time-consuming and require a certain level of skill. This is where Photoshop Actions come into play. A teeth whitening Photoshop action is essentially a pre-recorded series of steps designed to automate the teeth whitening process. It allows users of all skill levels to quickly and efficiently brighten the appearance of teeth in their photos. These actions are particularly useful for portraits, product photography, and any image where a bright, white smile is desired. They can save significant time compared to manual methods and offer a consistent result across multiple images. The beauty of this approach lies in its simplicity and accessibility.
Understanding Photoshop Actions
Photoshop Actions are essentially macros that record a sequence of tasks and commands within Adobe Photoshop. These can include anything from basic adjustments like brightness and contrast to more complex operations like applying filters or manipulating layers. Once recorded, these actions can be played back on any image, automating the process and saving time. They are saved as ATN files, which can be easily imported into Photoshop. Actions are incredibly versatile and can be used for a wide range of editing tasks, not just teeth whitening. They are a powerful tool that streamlines the editing workflow, making image manipulation more accessible and efficient for both novice and professional users. You can create your own actions or download them from various online resources, expanding your creative potential.
Benefits of Using Actions

The advantages of using Photoshop Actions, especially for teeth whitening, are numerous. Firstly, they dramatically reduce the time required for editing. Instead of manually adjusting the colors and brightness of each tooth, a single click can apply a pre-defined set of steps. Secondly, they ensure consistency. Each image processed with the same action will receive the same treatment, which is crucial for maintaining a cohesive look across a series of photos. Furthermore, actions are easy to use. Even those new to Photoshop can achieve professional-looking results without extensive knowledge of complex editing techniques. They also facilitate experimentation. You can try different actions or modify existing ones to find the perfect effect for your images. Actions are an invaluable tool for photographers, graphic designers, and anyone looking to enhance their images efficiently.
Where to Find Free Teeth Whitening Actions
The internet is a treasure trove of free Photoshop Actions, including those specifically designed for teeth whitening. Many websites offer a wide selection of actions that you can download and use. When searching for these, be sure to use specific keywords like “free Photoshop teeth whitening action” or “download teeth whitening ATN file”. It is important to be cautious when downloading files from the internet. Always ensure that you are downloading from a reputable source to avoid potential security risks. Look for websites with good reviews and a proven track record. Checking comments or testimonials can provide valuable insights into the reliability and effectiveness of the actions. By doing your research, you can find high-quality, free actions that will enhance your image editing workflow and produce amazing results.
Reliable Websites to Download From
Several websites are known for providing high-quality free Photoshop resources, including actions. Websites like DeviantArt, Behance, and specialized Photoshop resource sites are excellent places to start your search. Many professional photographers and designers share their actions for free to help the community. When browsing, look for websites that have clear instructions, offer previews of the actions, and provide user reviews. Always check the licensing agreements associated with the actions to understand how they can be used (e.g., personal or commercial use). Consider websites with a user-friendly interface and a wide variety of actions to ensure you find the perfect fit for your editing needs. Always prioritize websites that regularly update their content and offer support or tutorials.
Things to Consider Before Downloading

Before downloading any Photoshop Action, there are a few important factors to consider. First, ensure the action is compatible with your version of Photoshop. Older actions may not function correctly with newer versions, and vice versa. Check the file size and make sure you have enough storage space. Also, scan the downloaded file with antivirus software to protect your computer from potential malware or viruses. Read the action’s description carefully to understand its intended use and the recommended settings. Some actions may work better on certain types of images than others. Finally, familiarize yourself with the licensing terms to ensure you are using the action legally. By considering these aspects, you can have a safe and effective experience downloading and using free teeth whitening actions.
Downloading and Installing the Action
Once you’ve found a suitable Photoshop Action, the next step is to download and install it. The process is usually straightforward, but it’s crucial to follow the steps carefully. Usually, you’ll find a download link on the website offering the action. Click the link, and the ATN file will be saved to your computer. It is recommended to create a dedicated folder for your Photoshop Actions to keep them organized. This makes it easier to manage and locate your actions in the future. After downloading, make sure to extract the file if it’s in a compressed format (like a ZIP file). The installation itself involves loading the action into Photoshop, which is done via the Actions panel, which we’ll cover next. Properly installing the action ensures that it’s ready to use when you open your images in Photoshop.
Step-by-Step Installation Guide
Here’s how to install your downloaded teeth whitening action in Photoshop. First, open Photoshop. Then, navigate to the Actions panel. If you don’t see it, go to Window > Actions to make it visible. In the Actions panel, click the menu icon (three horizontal lines) in the top right corner. From the dropdown menu, select “Load Actions.” Browse to the location where you saved your downloaded ATN file and select it. Click “Load.” The action should now appear in your Actions panel, ready to be used. Some actions may appear in a new set. Practice using the action on a test image to ensure it is properly installed and functioning correctly before applying it to important photos. Regularly backing up your actions is advisable to avoid data loss.
Loading the Action in Photoshop

After the installation process, you’ll need to load the Photoshop action. Launch Adobe Photoshop and open the Actions panel, typically found under the “Window” menu. In the Actions panel, you should see a list of all your loaded actions. If the teeth whitening action doesn’t automatically appear, click on the small menu icon located in the top right corner of the Actions panel. Select “Load Actions” from the dropdown menu. A file browser will open; navigate to the location where you saved the ATN file of the teeth whitening action. Select the file and click “Load.” The teeth whitening action should now appear in your Actions panel, ready to use. You may also need to select the action from the dropdown menu to use it. If you are using several actions, consider organizing them into sets for better management and easier access.
Using the Teeth Whitening Action
Once you have successfully installed and loaded your teeth whitening action, you are ready to use it to transform your images. The use of the action is typically straightforward, involving a few simple steps. First, you need to open the image in Photoshop that you want to edit. Make sure the image is properly exposed and has good color balance. If necessary, perform basic image adjustments (brightness, contrast, etc.) before using the action. Locate the teeth whitening action in your Actions panel. Ensure the action is selected. Then, click the play button (the triangle icon) at the bottom of the Actions panel or by pressing the shortcut. The action will run through the pre-recorded steps, automatically whitening the teeth in your image. You may have to experiment with different actions to find the one that best suits your images.
Selecting the Right Image
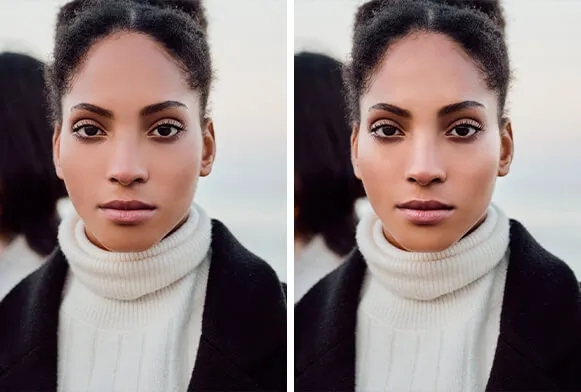
Not all images are created equal when it comes to using teeth whitening actions. The quality of your image can significantly impact the final results. Choose an image with a clear view of the teeth and good lighting. Images with direct, harsh lighting might create strong highlights and shadows that the action can’t correct effectively. Consider photos where the subject is smiling and the teeth are prominently displayed. Images with proper exposure and focus are crucial. Avoid extremely underexposed or overexposed photos, as these can affect the action’s performance. The initial condition of the teeth is also essential; actions will work best on teeth that are only slightly discolored. If teeth have severe staining, the action may not provide the desired results and manual adjustments might be needed. The more clear and well-lit your images are, the better the outcome of using the teeth whitening action will be.
Applying the Action

Applying the teeth whitening action is generally a simple process. After opening your chosen image in Photoshop and loading the desired action, select the action from the Actions panel. Make sure the action is active, then, click the play button at the bottom of the panel. The action will automatically execute the preset steps to whiten the teeth. Some actions may prompt you with options during the process, like selecting the area of the teeth or choosing the intensity of the whitening. If this is the case, follow the on-screen instructions provided by the action creator. During this process, Photoshop will perform the recorded operations. This usually includes creating adjustment layers, applying filters, and setting blend modes to achieve the teeth whitening effect. Watch the process, and you’ll see the teeth brightening in real-time. The whole process is very easy, helping you to quickly enhance your photos.
Fine-tuning the Results
After applying the teeth whitening action, you may need to fine-tune the results to get the perfect look. While actions are designed to automate the process, they may not always provide the exact result you desire for every image. One of the most common adjustments is the opacity of the action’s layer. If the teeth look too bright or artificial, reducing the opacity of the action’s layer can soften the effect and make the whitening appear more natural. You can usually find the action’s layer in the Layers panel. Adjusting the layer’s opacity is as easy as dragging the slider. Another way to fine-tune the results is by using layer masks. These allow you to selectively apply or remove the whitening effect from certain areas. If the action whitens the gums or other unwanted areas, you can use a layer mask to paint those areas back to their original color. Fine-tuning helps to create a more realistic and appealing outcome.
Common Issues and Troubleshooting
Even with the ease of use that comes with Photoshop Actions, you might encounter some common issues. Being prepared for these problems and knowing how to troubleshoot them is essential for ensuring a smooth editing process. The good news is that most problems can be resolved with a few simple adjustments. The most common issues often relate to the action’s compatibility, the image’s characteristics, and user settings. Understanding these potential pitfalls and how to resolve them will significantly improve your experience with free Photoshop actions.
Action Not Working Properly

If your teeth whitening action isn’t working as expected, there are several troubleshooting steps you can take. First, ensure that the action is correctly installed and loaded into Photoshop. Sometimes, simply reloading the action into the Actions panel can resolve issues. Check the compatibility of the action with your version of Photoshop. An older action might not function correctly with a newer version, and vice versa. Make sure your image is in the correct color mode (RGB is recommended). Ensure no other layers are active or selected before you play the action. Sometimes, an action might interfere with a previously used setting. If problems persist, try resetting your Photoshop preferences to their default settings. Back up your settings before doing this. Resetting can resolve conflicts. If all else fails, it might be a problem with the action itself, try a different action. By systematically working through these steps, you can often identify and fix the issues preventing the action from working properly.
Image Doesn’t Look Natural
One of the most common complaints about teeth whitening actions is that the results don’t look natural. The teeth might appear too bright, unrealistic, or even have a blue or gray cast. This is often due to the intensity of the action or the settings used within it. To address this, start by reducing the opacity of the action’s layer. This will soften the whitening effect and make it blend more seamlessly with the rest of the image. Using a layer mask can also help. By masking out areas where the whitening effect is too strong, you can create a more balanced and natural look. Adjusting the blend mode of the action’s layer can also help. Experiment with different blend modes like “Overlay” or “Soft Light.” Consider also adding a slight adjustment layer to the color or contrast of the teeth. A slight yellowing or shadow can add realism. Sometimes, a combination of these techniques is necessary to achieve a natural look. Patience and careful tweaking are essential.
Tips for Achieving Natural-Looking Results
Achieving natural-looking teeth whitening in Photoshop requires a nuanced approach, and it’s not just about clicking a button. The key is to avoid making the teeth appear too white or artificial. Start by selecting an image with good lighting and a clear view of the teeth. Before applying the action, consider basic image adjustments such as brightness and contrast to set a solid foundation. After the action is applied, always check the opacity of the action layer. Reducing it to a suitable level will make the whitening effect more subtle and realistic. Another tip is to use layer masks. This allows you to paint away the whitening effect from areas that need adjustment, like the gums. It’s also beneficial to focus on creating subtle differences in color. Avoid uniform whitening; add some variation in color and brightness to mimic natural teeth. Experiment with different actions and settings to find the one that best suits your style. Natural teeth whitening is a balance of subtlety and skill.
Adjusting Opacity and Layer Masks

Two essential techniques for achieving a natural look are adjusting the opacity and using layer masks. After applying the teeth whitening action, the results may seem too intense. To reduce the effect, adjust the opacity of the action layer. In the Layers panel, you will find the layer created by the action. Reduce its opacity slider to make the whitening effect more subtle and blend better with the original image. The optimal opacity level varies depending on the image and the action used, so experimenting is key. Layer masks are equally important. If certain areas of the teeth look unnaturally whitened, or if the whitening is affecting the gums, you can use a layer mask to selectively remove the effect. Create a layer mask on the action’s layer and then use a black brush to paint over the areas where you want to hide the whitening. Use a soft brush and low opacity to blend the effect. By combining these techniques, you can achieve a more realistic and appealing result.
Using Multiple Actions for Enhancement
Sometimes, a single teeth whitening action may not be enough to achieve the desired results. In such cases, you can use multiple actions to enhance the appearance of the teeth further. Using a combination of actions can provide a more tailored and refined outcome. For example, you can use one action for initial whitening and then apply another action to adjust the color, brightness, or contrast. When combining actions, it’s important to pay attention to the order in which you apply them. Apply the base whitening action first and follow it with any corrective actions. You may also need to adjust the opacity and layer masks for each action to ensure a harmonious and natural result. Using multiple actions allows you to create a more complex and refined effect. Experiment with different combinations to find the perfect approach.
Conclusion
Teeth whitening Photoshop actions offer a convenient and efficient way to enhance the appearance of teeth in your photos. By understanding the basics of actions, knowing where to find them, and learning how to troubleshoot common issues, you can dramatically improve your image editing workflow. Remember to always download actions from reputable sources, and check for compatibility with your version of Photoshop. Fine-tune the results with adjustments to opacity and layer masks to achieve a natural look. Combining multiple actions and experimenting with different settings will empower you to create stunning and professional results. With the right approach, free teeth whitening actions can become an invaluable tool in your editing arsenal, helping you to achieve beautiful smiles in every image.