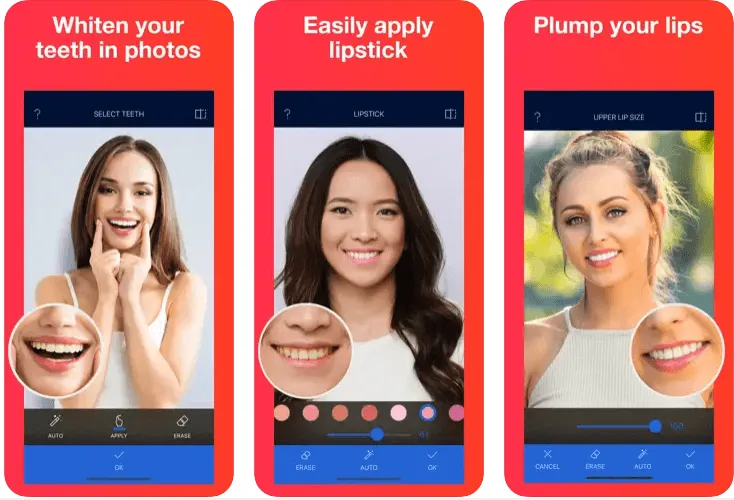
What is Teeth Whitening Photo Editor App
In the digital age, where social media reigns supreme, the quest for the perfect smile has led to the rise of teeth whitening photo editor apps. These innovative applications empower users to subtly or dramatically enhance their smiles, correcting imperfections and boosting confidence. Unlike professional dental treatments, these apps offer a convenient, accessible, and often free solution for achieving a brighter smile in your digital photos. They utilize advanced algorithms and user-friendly interfaces, making it easy for anyone to manipulate the color and appearance of their teeth within a few taps. This technology is designed to cater to the growing need for quick and easy image enhancements, particularly for sharing photos on platforms like Instagram, Facebook, and others.
The appeal of these apps lies in their ability to offer instant results without the cost or time commitment of in-office procedures. They provide a level of control over your image that wasn’t previously possible, allowing you to tailor the effect to your exact preferences. Whether you’re preparing for a special event, updating your profile picture, or simply wanting to feel better about your appearance in photos, teeth whitening apps provide a quick fix. However, it’s crucial to understand the capabilities and limitations of these tools to achieve realistic and natural-looking results. Excessive editing can lead to unnatural appearances, so moderation and a keen eye for detail are essential.
Features to Look for in a Teeth Whitening Photo Editor App
When choosing a teeth whitening photo editor app, several key features can significantly impact the quality of your results. First and foremost, consider the tools specifically designed for whitening. Look for apps that offer a dedicated whitening brush or slider, allowing you to precisely target the teeth while avoiding the surrounding areas. The best apps provide a range of options, from subtle enhancements to more dramatic changes, giving you control over the intensity of the effect. Furthermore, the ability to adjust the brush size and feathering is crucial for achieving a natural look. This ensures a seamless blend between the whitened teeth and the adjacent areas of the image.
Beyond the primary whitening tools, other features contribute to the overall quality of the app. The capacity to edit other aspects of the photo, such as brightness, contrast, and color balance, can enhance the overall aesthetic. Some apps offer automatic teeth detection, which streamlines the whitening process by identifying the teeth automatically. User-friendly interfaces, with intuitive controls and clear instructions, are also vital for a smooth editing experience. Consider apps with undo/redo functions and the ability to compare the before and after versions of your photo. Ultimately, the best app will offer a combination of powerful features, ease of use, and the ability to achieve natural-looking results.
Adjusting Brightness and Contrast

Before diving into the teeth whitening process, consider adjusting the brightness and contrast of your photo. These fundamental editing tools can dramatically affect the overall look and feel of your image, making it easier to achieve natural-looking results. Increasing the brightness can illuminate the entire scene, revealing more details and making the teeth appear brighter. However, be cautious not to overexpose the image, which can wash out colors and make the teeth look unnatural. Conversely, adjusting the contrast helps define the shadows and highlights, adding depth and dimension to the photo. A slight increase in contrast can often enhance the appearance of the teeth, making them pop.
When adjusting brightness and contrast, it’s essential to consider the overall lighting conditions in your photo. If the image is already well-lit, you may only need to make subtle adjustments. In contrast, photos taken in dim lighting may require more significant adjustments. Remember that the goal is to create a balanced image where the teeth appear naturally bright within the context of the entire photo. Experimenting with these settings before whitening can also help reduce the need for excessive whitening, which can sometimes lead to an artificial appearance. By carefully balancing brightness and contrast, you lay the foundation for a more realistic and pleasing final image. Refer to the image of adjusting brightness and contrast to guide you.
Using the Whitening Tools
The core functionality of a teeth whitening photo editor app lies in its dedicated whitening tools. These tools, usually in the form of a brush or a slider, allow you to selectively alter the color of the teeth. When using the brush tool, carefully apply it over the teeth, ensuring that you cover the entire surface without spilling over onto the gums or other surrounding areas. A precise application is key to achieving a natural look. Most apps allow you to adjust the brush size, which is essential for working with teeth of different sizes and shapes. Start with a smaller brush size and gradually increase it as needed.
If the app features a slider, use it to increase or decrease the whiteness level. Start with a subtle adjustment and gradually increase the intensity until you achieve the desired result. The best apps offer a preview function, which allows you to see the changes in real-time, making it easier to assess the outcome. Besides the primary whitening tools, look for features like a color picker, allowing you to fine-tune the shade of white applied to your teeth. Some apps also offer automatic teeth detection, streamlining the editing process and saving you time. Mastering these whitening tools takes practice, so experiment with different settings and features to find what works best for you. Remember to refer to the image for guidance and best results.
Adjusting the Intensity of Whitening
One of the most critical aspects of teeth whitening is controlling the intensity. Over-whitening can lead to an unnatural, stark white appearance, which often looks artificial and can be easily detected. The key is to start with a subtle adjustment and gradually increase the intensity until you achieve a natural-looking result. Most apps offer a slider or a scale that allows you to control the intensity of the whitening effect. Begin by moving the slider just a small amount and evaluate the change. Observe the teeth and their relationship to the surrounding areas, such as the gums and skin tone. Ensure that the teeth blend seamlessly and don’t appear drastically different from their natural shade.
Consider the context of your photo when adjusting the intensity. If the photo was taken in bright sunlight, you might be able to apply a slightly stronger whitening effect. In contrast, photos taken in dim lighting might require a more subtle approach. The goal is always to make the teeth look naturally bright within the overall lighting of the image. Furthermore, it’s essential to consider the original shade of your teeth. If your teeth are naturally whiter, you’ll want to be more conservative with the whitening effect. The image illustrates adjusting whitening intensity as a guide. Finally, always compare the before and after versions of your photo to assess the changes and make sure they appear realistic.
Enhancing the Smile

Beyond simply whitening teeth, some photo editor apps offer tools to enhance the overall appearance of your smile. These tools can address imperfections, such as slight crookedness, gaps between teeth, or minor discoloration that whitening alone may not fix. These features provide a more comprehensive approach to achieving the perfect smile. Use the tools to subtly adjust the alignment of the teeth, ensuring they appear straight and symmetrical. Be cautious and make small adjustments, avoiding drastic changes that could look unnatural. Gaps between teeth can be minimized by carefully adjusting the shape and position of the teeth. Discoloration in certain areas, such as the edges of the teeth, can be corrected with a targeted color correction tool.
Furthermore, many apps offer tools to subtly reshape or refine the edges of the teeth, creating a more aesthetically pleasing smile. Use these tools with caution, focusing on subtle adjustments rather than dramatic changes. If the photo shows a wide smile, consider using tools to gently smooth the corners of the mouth or reduce any wrinkles that might be present. These enhancements should be done to complement the teeth whitening process, creating a harmonious overall effect. The goal is to create a natural-looking, confident smile. Refer to the image for further guidance and optimal results.
Editing Teeth Color
Editing the color of your teeth is a crucial step in achieving natural-looking results with a photo editor app. While whitening is the primary goal, sometimes subtle adjustments to the color can further enhance the appearance. Some apps offer color correction tools, allowing you to fine-tune the shade of white applied to your teeth. You might find that your teeth have a slightly yellow or gray tint, even after whitening. By adjusting the color, you can neutralize these unwanted tones and create a brighter, more uniform appearance.
When color correcting, start with small adjustments. Most apps offer a color wheel or a palette from which you can select a specific shade of white. Avoid selecting a stark white that will look unnatural. Instead, opt for a slightly warmer tone that complements the overall skin tone and lighting of the photo. Pay attention to the subtle nuances of color. Sometimes, a touch of yellow can make the teeth appear more natural, while a touch of blue can neutralize any unwanted yellow tones. Use the color correction tools selectively, focusing only on the areas that need adjustment. It’s easy to overdo color correction, so remember to check the image for guidance.
Removing Blemishes and Imperfections
Beyond teeth whitening, photo editor apps offer tools to address other imperfections that may affect your smile’s appearance. Removing blemishes and imperfections can contribute to a more polished and confident final image. These tools are usually located under the retouching or spot removal section of the app. Use the spot removal tool to erase any dark spots, stains, or discoloration on the teeth. Be careful to only target the blemishes and not the surrounding enamel. You can also use this tool to correct small chips or cracks in the teeth.
If you have any minor imperfections on the lips or around the mouth, such as small wrinkles or blemishes, you can use the same spot removal tool to correct them. This can help create a more symmetrical and youthful appearance. If you have any persistent stains or discoloration, you may need to adjust the color and saturation of the affected area, but do this with caution. The goal is to enhance your smile without making it appear artificial. Remember to refer to the image for the best results and before you start editing, make sure the lighting is adequate. The spot removal tool helps you to get the best results and have a great smile. Remember to use these tools sparingly and to focus on natural-looking results.
Tips for Natural-Looking Results

Achieving natural-looking results is the ultimate goal when using a teeth whitening photo editor app. Here are some tips to guide you. Start with subtle adjustments. It is always better to start with a lower intensity and gradually increase it. Avoid making drastic changes that could look artificial. Pay close attention to the lighting of your photo. If the lighting is uneven or harsh, it can make it difficult to achieve a natural look. Consider adjusting the brightness and contrast before whitening, and then make sure the teeth match the overall lighting of the photo. When using the whitening brush, be careful to apply it evenly across the surface of the teeth and avoid spilling over onto the gums. Blending is the key!
Always compare the before and after versions of your photo to assess the results and make any necessary adjustments. The goal is to create a polished and confident smile that still looks like you. Don’t be afraid to experiment with different settings and tools. Every photo is different, and what works for one image may not work for another. Take your time and have fun! When you’re ready, share it with the world! Consider the context of the photo. A more subtle approach might be appropriate for a professional portrait, while a more noticeable whitening effect may be acceptable for casual social media posts. When adjusting the intensity of the whitening, avoid making the teeth appear too bright compared to the surrounding areas. The image should reflect the best results when you apply these steps to your images.
Avoiding Over-Whitening
Avoiding over-whitening is crucial for achieving natural-looking results. Over-whitening can lead to a stark, unnatural appearance that can easily be spotted. The best way to avoid this is to start with small adjustments and gradually increase the intensity of the whitening effect. Always compare the before and after versions of your photo, assessing whether the teeth look naturally bright or artificial. If the teeth appear too bright compared to the surrounding areas, such as the gums and skin tone, you have likely over-whitened. In such cases, reduce the intensity of the whitening effect until it looks more balanced.
Be particularly careful with photos taken in bright sunlight or with strong lighting. The teeth will naturally appear brighter in these conditions, so you may need to use less whitening effect than in other lighting scenarios. Consider the original shade of your teeth. If your teeth are already relatively white, you will need to be more conservative with the whitening effect. The goal is to enhance your smile without making it appear fake. Refer to the image to maintain a natural appearance, preventing the teeth from looking too opaque or unnaturally white.
Comparing Photo Editor Apps
With numerous photo editor apps offering teeth whitening features, comparing your options is essential to choose the best one for your needs. Consider ease of use and the user-friendly interface. The app should have intuitive controls and clear instructions. Look at the available features, such as teeth whitening tools, the ability to adjust brightness and contrast, and the ability to correct other imperfections. Some apps also offer advanced features, like teeth detection or automatic color correction. Read reviews to determine the experiences of other users. This can give you insights into the app’s performance, reliability, and the overall quality of the results.
Many apps are free to download, but they may offer in-app purchases for additional features or tools. Consider whether the app offers a free trial, allowing you to test its features before committing to a purchase. The best app will offer a balance of powerful features, ease of use, and the ability to achieve natural-looking results. Experiment with different apps to determine which ones best suit your editing style and needs. Some apps are better suited for beginners, while others offer more advanced features for experienced users. The image illustrates an example of the comparison. The best app will ultimately depend on your personal preferences, the quality of your photos, and the results you want to achieve. By researching and comparing your options, you’ll find the perfect app to help you whiten your teeth in photos.