
Understanding Skin Whitening and Homemade Soap
Skin whitening, also known as skin lightening, is a process that aims to reduce the melanin pigment in the skin, resulting in a lighter complexion. This can be achieved through various methods, including the use of creams, lotions, and soaps. Homemade skin whitening soap offers a natural and often safer alternative to commercially produced products, allowing you to control the ingredients and tailor the soap to your specific skin needs. This comprehensive guide will walk you through everything you need to know to create your own effective and safe skin whitening soap at home, empowering you with knowledge and the tools to achieve your desired skin tone naturally. Understanding the fundamentals of skin whitening, coupled with the benefits of homemade soap, forms the foundation for a successful and informed skincare journey.
What is Skin Whitening?
Skin whitening involves reducing melanin, the pigment responsible for skin color. It’s a broad term encompassing various techniques and products, including soaps, creams, and chemical treatments. The primary goal is to lighten the skin, often for cosmetic reasons, or to address hyperpigmentation issues like dark spots, sun damage, and uneven skin tone. Many individuals seek skin whitening to achieve a more uniform and brighter complexion. While results vary depending on skin type and the methods employed, the underlying principle remains the same: to modulate melanin production and distribution within the skin. However, it’s essential to approach skin whitening with caution, understanding the potential risks, and prioritizing natural and gentle methods like homemade soap to avoid adverse reactions and maintain skin health.
Why Choose Homemade Skin Whitening Soap?
Opting for homemade skin whitening soap presents several advantages over commercially available products. Firstly, you have complete control over the ingredients. This allows you to avoid harsh chemicals, artificial fragrances, and preservatives often found in store-bought soaps, reducing the risk of skin irritation and allergic reactions. Secondly, homemade soap enables you to customize the formulation to suit your unique skin type and concerns. You can tailor the blend of essential oils and other ingredients to address specific issues, such as dryness, acne, or sensitivity. Finally, making your own soap can be a cost-effective way to maintain a skincare routine, as the ingredients are often more affordable than premium commercial products. By choosing homemade skin whitening soap, you embrace a natural, personalized, and budget-friendly approach to achieving a brighter complexion.
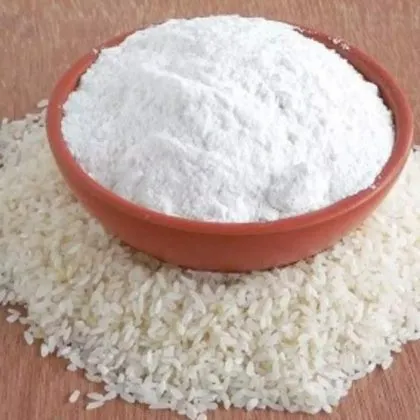
Ingredients You’ll Need
Creating effective homemade skin whitening soap requires careful selection of ingredients known for their skin-lightening properties and overall benefits. The core component is a soap base, either melt-and-pour or made from scratch using the cold process method. Melt-and-pour bases are easier for beginners, offering convenience and simplicity. Essential oils play a crucial role, with options like lemon, grapefruit, and licorice root offering natural whitening effects. Other natural ingredients, such as honey, turmeric, and kojic acid, further enhance the soap’s effectiveness. The quality of the ingredients directly impacts the final product. High-quality essential oils, natural colorants, and additives are vital for creating a soap that not only whitens but also nourishes and protects your skin. Consider sourcing organic and ethically produced ingredients to ensure the best results.
Essential Oils for Skin Whitening
Essential oils are potent, concentrated extracts derived from plants and are a key component of homemade skin whitening soap, offering natural skin-lightening properties and additional benefits. Lemon essential oil, rich in Vitamin C, is a popular choice for its brightening effects and ability to even out skin tone. Grapefruit essential oil also contains Vitamin C and antioxidants, helping to combat free radicals and promote a radiant complexion. Licorice root essential oil contains glabridin, which can inhibit melanin production, making it effective for reducing hyperpigmentation. When selecting essential oils, it’s crucial to choose high-quality, pure oils from reputable sources. Always dilute essential oils properly, as they can be irritating when used undiluted. A general guideline is to add about 10-20 drops of essential oil per pound of soap base. Perform a patch test before widespread use to check for any allergic reactions or sensitivity.
Other Natural Ingredients

In addition to essential oils, other natural ingredients can significantly enhance the effectiveness and benefits of your homemade skin whitening soap. Honey, a natural humectant, helps to moisturize the skin, promoting a healthy glow. Turmeric, with its anti-inflammatory and antioxidant properties, is known to reduce dark spots and brighten the complexion. Kojic acid, derived from fungi, is a powerful skin-lightening agent that inhibits melanin production. Other beneficial ingredients include aloe vera, which soothes and hydrates the skin, and milk, which contains lactic acid, a gentle exfoliant. Experiment with these ingredients to create a customized soap tailored to your skin’s specific needs. Always research the properties and safety of each ingredient and introduce them gradually to assess how your skin responds. The combination of essential oils and other natural ingredients will create a potent yet gentle skin whitening soap.
Step-by-Step Guide to Making Homemade Skin Whitening Soap
Creating your own homemade skin whitening soap is a rewarding process that allows you to take control of your skincare routine. This comprehensive guide will walk you through the essential steps, from gathering your supplies to the curing and storage of your finished product. Whether you’re a beginner or an experienced soap maker, this guide provides clear instructions and helpful tips to ensure successful and safe results. Follow each step carefully to create a beautiful, effective soap that will leave your skin feeling clean, refreshed, and rejuvenated. Remember to always prioritize safety, use appropriate equipment, and be patient, as curing and storage are essential for achieving optimal results. With a little patience and practice, you’ll be able to craft luxurious, skin-whitening soap that rivals any store-bought product.
Gathering Your Supplies
Before you begin making your homemade skin whitening soap, gather all the necessary supplies. For melt-and-pour soap making, you’ll need a soap base (glycerin, goat milk, etc.), essential oils, and other desired natural ingredients (turmeric powder, honey, etc.). You’ll also need a heat-safe container for melting the soap base, a double boiler or microwave-safe bowl, a stirring utensil (silicone spatula or wooden spoon), and soap molds (silicone molds are easiest). Protective gear like gloves and safety glasses is recommended to prevent accidental splashes. For the cold process method, you’ll need lye (sodium hydroxide), oils and fats, a stick blender, a digital scale, and a thermometer. Ensure you have a well-ventilated workspace and carefully measure all ingredients for safety and consistency. Having all these supplies on hand will streamline the soap-making process and make it more enjoyable.
Melting and Mixing the Soap Base

The melting and mixing stage is a crucial step in creating your homemade skin whitening soap, setting the stage for the final product. If using a melt-and-pour base, cut the soap base into small cubes to facilitate even melting. Gently melt the soap base using a double boiler or microwave. If using a microwave, heat in short bursts (30 seconds) and stir frequently to prevent overheating. For the cold process method, combine the lye with water, and allow it to cool to the desired temperature. Once the soap base is fully melted (or lye solution is cooled), carefully add your chosen essential oils and natural ingredients. Stir gently to ensure an even distribution of ingredients. Be careful not to overheat the soap base, as this can affect its quality and the potency of the essential oils. This step requires patience and precision, ensuring that the soap base is properly prepared for the next stage: pouring it into your molds.
Adding Essential Oils and Ingredients
Once the soap base is melted and at the correct temperature, it’s time to incorporate the essential oils and other beneficial ingredients that will give your homemade skin whitening soap its unique properties. Carefully measure your essential oils and gently stir them into the melted soap base. If using other ingredients like turmeric powder, honey, or kojic acid, add them at this stage, mixing thoroughly to ensure even distribution. Stir gently to avoid creating bubbles, and ensure that all ingredients are fully integrated. This is where the magic happens, transforming a basic soap base into a customized skin whitening product. Be mindful of the recommended usage rates for each ingredient, as using too much can compromise the soap’s quality or irritate the skin. Take your time and savor the process, knowing that you’re adding natural goodness that your skin will love.
Pouring the Soap into Molds
After the essential oils and other ingredients are mixed, it’s time to pour the soap mixture into your chosen molds. Prepare your molds by lightly spraying them with alcohol or using a mold release agent to prevent the soap from sticking. Slowly and carefully pour the soap mixture into the molds, filling each cavity evenly. You can gently tap the molds on the counter to release any air bubbles. For aesthetic appeal, you can decorate the top of the soap by sprinkling dried herbs, adding swirls with a toothpick, or using a pipette to create patterns. Once the soap is poured, allow it to cool and harden. Cover the molds with plastic wrap or a lid to prevent dust from settling on the surface. The pouring stage is a satisfying culmination of the soap-making process, and the final result will be a batch of beautifully crafted skin whitening soaps.
Curing and Storing Your Soap

Curing is a critical step in the soap-making process, as it determines the quality and longevity of your homemade skin whitening soap. After the soap has cooled and hardened in the molds, carefully remove the bars. Place the soap bars on a well-ventilated surface, such as a wire rack, where air can circulate freely around them. Allow the soap to cure for several weeks, typically 4-6 weeks, depending on the recipe and environmental conditions. During this time, the water evaporates, and the soap hardens, becoming milder and longer-lasting. Rotate the bars regularly to ensure even curing. Store your cured soap in a cool, dry place away from direct sunlight to maintain its quality and extend its shelf life. Proper curing and storage will ensure that your soap is gentle, effective, and a pleasure to use, providing your skin with the best results.
Tips for Optimal Results
To achieve the best results with your homemade skin whitening soap, consider these tips. Consistency is key; use the soap regularly, ideally twice a day, for optimal results. Exfoliate your skin 1-2 times per week to remove dead skin cells, enhancing the soap’s effectiveness. Follow up with a moisturizer to keep your skin hydrated, as some skin whitening ingredients can be drying. Perform a patch test before widespread use, especially if you have sensitive skin, to check for allergic reactions. Stay hydrated by drinking plenty of water, as this supports overall skin health. Protect your skin from the sun by wearing sunscreen daily, as sun exposure can counteract the benefits of skin whitening. Be patient, as results may take time. By incorporating these tips into your skincare routine, you can maximize the benefits of your homemade skin whitening soap.
Safety Precautions
When making and using homemade skin whitening soap, safety should always be your top priority. Always wear protective gear, including gloves and safety glasses, when handling lye (sodium hydroxide) in the cold process method. Lye can cause severe burns if it comes into contact with skin or eyes. Work in a well-ventilated area to avoid inhaling fumes. If lye spills, immediately flush the affected area with plenty of water. Avoid using harsh ingredients, such as strong acids or bleach, as they can damage your skin. Always perform a patch test before using the soap on a larger area to check for any allergic reactions or sensitivity. If you experience any irritation or adverse reactions, discontinue use immediately. Consult with a dermatologist if you have any concerns about skin whitening or have existing skin conditions. Prioritizing safety ensures a positive and enjoyable experience, allowing you to enjoy the benefits of homemade skin whitening soap without compromising your well-being.
Addressing Common Concerns

When using homemade skin whitening soap, it’s important to address common concerns and manage expectations. One of the most common concerns is the speed of results. Skin whitening is a gradual process, and it may take several weeks or even months to see noticeable changes. Patience and consistency are key. Another concern is skin sensitivity. Some ingredients may cause dryness, redness, or irritation, especially for those with sensitive skin. Start with a small area and monitor your skin’s response. Address any irritation by reducing frequency of use or changing the formulation. Dark spots may not disappear completely; they may lighten significantly. Also, understand that achieving permanent skin whitening is challenging. Continuous use and maintenance are typically required to maintain the desired results. By managing your expectations, understanding the process, and taking appropriate precautions, you can effectively navigate the world of homemade skin whitening soap.
Shelf Life and Storage
Proper storage and an understanding of the shelf life of your homemade skin whitening soap will ensure its quality and prolong its effectiveness. Store your soap in a cool, dry place away from direct sunlight and excessive heat. The shelf life of homemade soap can vary depending on the ingredients, but it’s generally recommended to use it within 12-18 months. Store your soap in an airtight container or wrap it in parchment paper to protect it from air and moisture. Over time, the essential oils may lose their potency, and the soap’s scent may fade. If you notice any signs of rancidity, such as a change in color or a stale smell, it’s best to discard the soap. By practicing proper storage and using your soap within the recommended timeframe, you can enjoy its benefits and maintain its effectiveness for as long as possible. Additionally, when you are not using the soap, make sure it is kept in a dry place to avoid unnecessary dissolving.
Benefits of Using Homemade Skin Whitening Soap
Homemade skin whitening soap offers a variety of benefits that make it an appealing choice for those seeking a brighter complexion. Unlike many commercial products, homemade soap is free from harsh chemicals, artificial fragrances, and preservatives, minimizing the risk of skin irritation and allergic reactions. You have complete control over the ingredients, allowing you to tailor the formulation to your specific skin type and concerns. The use of natural ingredients, such as essential oils, honey, and turmeric, provides skin-lightening benefits and nourishes the skin, promoting a healthy glow. Additionally, making your own soap can be a cost-effective way to maintain a skincare routine, saving you money compared to purchasing expensive commercial products. By choosing homemade skin whitening soap, you embrace a natural, personalized, and budget-friendly approach to achieving your skincare goals while prioritizing the health and well-being of your skin.
Cost-Effectiveness

One of the notable advantages of homemade skin whitening soap is its cost-effectiveness. While the initial investment in supplies, such as soap base, essential oils, and molds, may seem significant, the cost per bar of soap is often considerably lower than that of commercially produced products. You can buy ingredients in bulk, reducing the cost per use. Homemade soap also allows you to avoid the added expenses associated with packaging, marketing, and distribution that contribute to the higher prices of store-bought products. By creating your own soap, you can save money while still enjoying high-quality ingredients tailored to your needs. Over time, the savings can be substantial, making homemade soap a budget-friendly option for maintaining a consistent skincare routine. The economic benefits, combined with the natural ingredients, make homemade skin whitening soap a smart and sustainable choice.
Avoiding Harsh Chemicals
Another significant benefit of homemade skin whitening soap is the ability to avoid harsh chemicals commonly found in commercial products. Many store-bought soaps contain synthetic fragrances, preservatives, and detergents that can irritate the skin and cause allergic reactions. By making your own soap, you have the power to control the ingredients, choosing natural and gentle alternatives that are kinder to your skin. You can avoid sodium lauryl sulfate (SLS), parabens, and artificial colors, which can strip the skin of its natural oils and disrupt its delicate balance. Homemade soap offers a pure, unadulterated cleansing experience, reducing the risk of irritation, dryness, and other adverse effects. This makes homemade soap particularly beneficial for those with sensitive skin or those who prefer a more natural approach to skincare. By avoiding harsh chemicals, you are prioritizing the health and well-being of your skin.
Customization Options
Homemade skin whitening soap provides unparalleled customization options, allowing you to create a product tailored to your unique skin type, concerns, and preferences. You can experiment with a wide range of essential oils, carrier oils, and other natural ingredients to address specific issues, such as dryness, acne, or uneven skin tone. Adjust the formulation to suit your individual needs. Want a soap that deeply hydrates? Include shea butter and honey. Want to fight blemishes? Add tea tree oil and turmeric. The possibilities are endless, and the results are far more personalized than anything you can find in a store. By customizing your soap, you can create a skincare routine that targets your specific concerns, maximizing effectiveness and achieving your desired results. This level of personalization is a significant advantage of making your own skin whitening soap.
Maintaining a Consistent Skincare Routine

To maximize the benefits of your homemade skin whitening soap, maintaining a consistent skincare routine is essential. Use the soap regularly, preferably twice a day, as part of your daily cleansing ritual. Follow up with a moisturizer to keep your skin hydrated, as some skin whitening ingredients can be drying. Exfoliate your skin 1-2 times per week to remove dead skin cells and enhance the soap’s effectiveness. Protect your skin from the sun by wearing sunscreen daily, as sun exposure can counteract the effects of skin whitening. Consider incorporating other skincare products, such as serums and toners, to address specific concerns. By establishing a consistent routine, you create a healthy foundation for your skin, allowing it to benefit fully from the skin whitening soap and supporting your overall skincare goals. Consistency is key to seeing visible results and maintaining a brighter, healthier complexion.